No products in the cart.
Return To Shop


A Must-Read Before Planning Water and Electrical Positioning
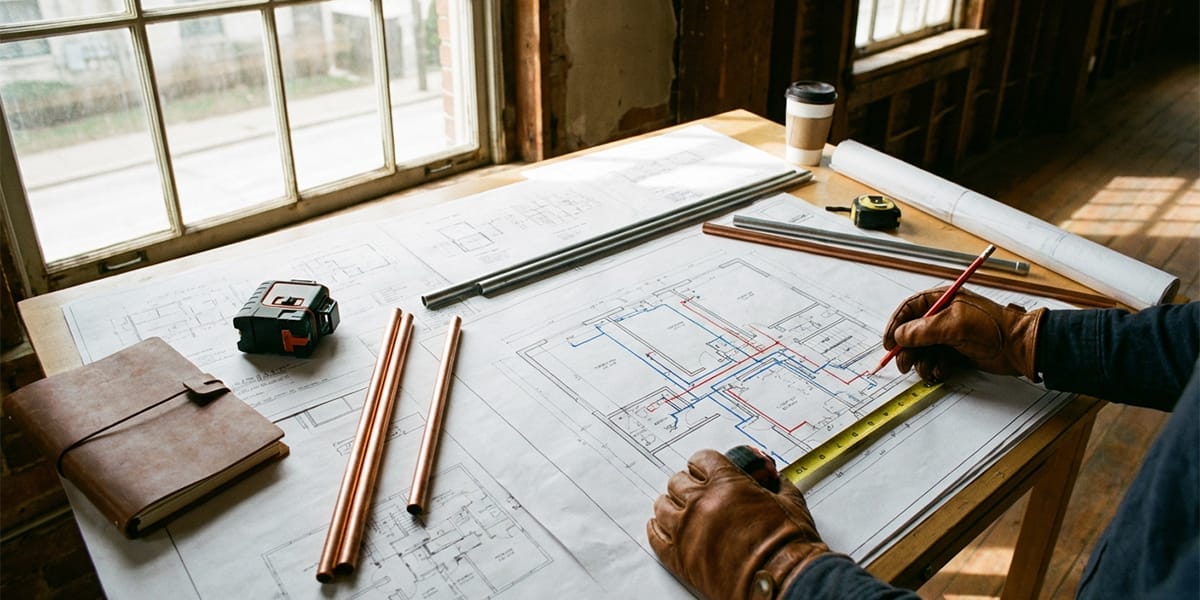
When it comes to home renovation, the positioning of water supply and electrical points is extremely important. If this step is not handled properly, many products may not be installed correctly later, and daily use can be inconvenient or even problematic. This is why most homeowners pay close attention to this stage of the renovation.
Below is a clear, structured explanation of how water and electrical positioning is typically planned during a home renovation.
Table of Contents
Step 1: Preparations Before Positioning

Before on-site positioning begins, several key tasks must be completed in advance. Only after these preparations are finished should the positioning appointment be scheduled.
1. Finalize the floor plan
The designer completes the layout based on the homeowner’s needs, clearly defining how each area of the home will be used.
2. Complete water and electrical diagrams
Based on the finalized layout and functional requirements, the designer prepares detailed water and electrical plans and brings them to the site on the positioning day.
3. Confirm appliance, fixture, and furniture dimensions
Accurate dimensions for appliances, bathroom fixtures, cabinets, and furniture are essential. On-site positioning relies heavily on these measurements to ensure smooth installation and comfortable daily use later.
4. Clarify household living habits
Water and electrical positioning is not fixed or universal. It should be adjusted according to how each family member uses the space. These habits should be clearly discussed before work begins.
Step 2: Scheduling the On-Site Positioning
On the day of positioning, several parties should be present, including:
- Homeowner
- Designer
- Project manager
- Water and electrical technician
- Representatives from product suppliers (such as central air conditioning, cabinets, bathroom fixtures, whole-house customization, doors and windows, smart home systems, etc.)
The exact participants depend on the products used in the home.
Once the time is confirmed, suppliers bring their technical drawings and product specifications to the site. The renovation company prepares tools such as laser levels, markers, and measuring tapes. The on-site positioning process can then officially begin.
Step 3: On-Site Water and Electrical Positioning
After all preparations are complete, the actual positioning work starts. This stage typically includes the following parts:
1. Water Supply Positioning

Water supply lines are relatively straightforward, so this part is usually completed first. Positioning mainly involves the kitchen, bathrooms, and balcony.
Kitchen
Key points include:
- Water inlet valve under the sink
- Hot and cold water supply for the sink
- Reserved hot and cold water connections for the gas water heater near the window
All positions should follow the cabinet supplier’s drawings.
Bathroom
Water point requirements vary depending on bathroom functions. Most bathrooms include:
- Hot and cold water for the sink
- Cold water for the toilet
- Hot and cold water for the shower
- Cold water for a washing machine (if installed)
The renovation company provides standard installation heights, which the homeowner can adjust according to personal and family habits.
Balcony
Only balconies used for daily chores typically require water supply. Common configurations include:
- Hot and cold water for a utility sink
- Cold water for a washing machine
Recommended positions are provided by the renovation team and fine-tuned based on homeowner preferences.
2. Drainage Positioning
Drainage positioning is mainly adjusted based on living habits. If bathroom fixtures or appliances have already been purchased, suppliers will provide drainage requirements. The renovation company then determines the most suitable drainage locations based on these specifications.
3. Switch and Outlet Positioning
Most homes follow several standard height references:
- 300 mm – Standard power outlets
- 1300 mm – Light switches
- 1800 mm – Air conditioner outlets
- 2200 mm – Range hood outlets
- 150 mm above countertop – Kitchen outlets
Once these reference heights are understood, positioning becomes much more efficient.
4. Ceiling Light Positioning
This is generally the simplest step, as ceiling lights follow the designer’s lighting plan. The homeowner only needs to confirm that the locations match daily usage habits.
Minor adjustments can still be made later, even after ceiling installation. It is important to communicate with the air conditioning supplier to avoid conflicts between air ducts and lighting fixtures.
Step 4: Final Confirmation
After positioning is complete, technicians mark all water and electrical points directly on the walls. The renovation company then conducts a full walkthrough of the home, starting from the entrance, to recheck every point.
The homeowner and relevant suppliers should participate in this final inspection. If anything feels inconvenient or unsuitable, adjustments can still be made at this stage.
Once all parties confirm the positions, the renovation company takes detailed photos for records. This ensures that all information is preserved before wall cutting begins.
Conclusion
Water and electrical positioning is essentially a multi-party coordination process during home renovation. As long as each step is handled carefully, the process itself is not complicated.
For homeowners, the most important task is to clearly communicate family needs and daily habits. The technical execution can then be confidently entrusted to the renovation team and product suppliers.
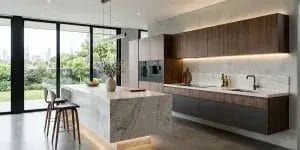
If you are lacking inspiration for your kitchen layout or have not yet found a suitable design plan, you can visit the official website of RaraRTAcabinets. It offers free design ideas, and its Shaker-style cabinets are known for their solid quality and practical value.


About author
Related posts

For years, homeowners on Reddit’s r/kitchenremodel and r/DesignMyRoom have asked the same question: “Are two-tone kitchen cabinets a timeless classic, or just a trendy style... Continue reading

When people shop for new cabinet doors, they often focus on color, style, or finish first. That makes sense. But in real home projects, the... Continue reading

Painting bathroom cabinets is not the same as painting a dresser or a living room shelf. A bathroom is a humid space, which means the... Continue reading
Floating cabinets are beautiful. They make a space feel lighter, cleaner, and more refined. No bulky legs, no visual clutter — just a clean, modern... Continue reading

Cabinets take up a large part of any kitchen, bathroom, or laundry room. When the color no longer feels right, the whole space can start... Continue reading


Add comment