No products in the cart.
Return To Shop


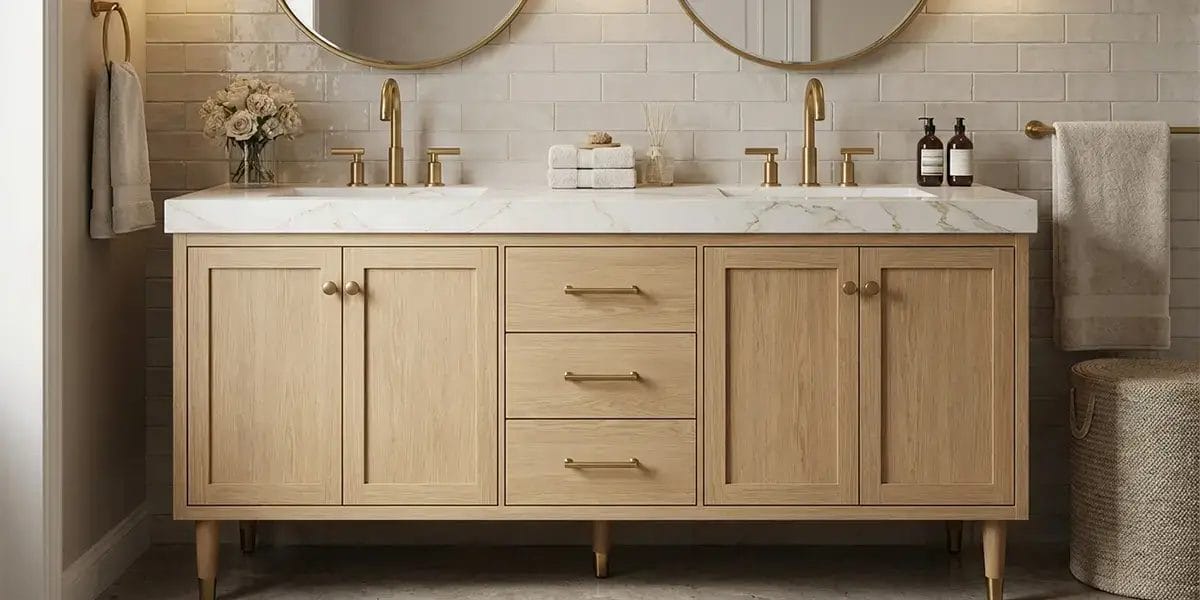
How to Install a Freestanding Bathroom Vanity (Step-by-Step DIY Guide)
Upgrading your bathroom doesn’t always require a full remodel. In many cases, replacing the vanity alone can completely transform the space.
If you’ve chosen a freestanding bathroom vanity, you’re already making the installation process easier. Unlike wall-mounted vanities, freestanding models sit directly on the floor, which means you don’t have to worry about heavy wall reinforcement or complicated load-bearing anchors.
Still, plumbing connections and precise alignment require attention to detail.
This beginner-friendly guide walks you through the entire freestanding bathroom vanity installation process, step by step.
Table of Contents
Why Choose a Freestanding Bathroom Vanity?
Before jumping into installation, it helps to understand why many homeowners prefer freestanding vanities:
- Easier installation compared to wall-mounted units
- More forgiving for imperfect walls
- Suitable for DIY projects
- Typically more budget-friendly
- Available in both pre-assembled and ready-to-assemble (RTA) styles
If you’re planning a DIY bathroom upgrade, this type of vanity offers the best balance between simplicity and style.
Tools & Materials You’ll Need
Having everything ready before you start will save you time and frustration.
Basic Tools:
- Adjustable wrench
- Drill with bits
- Level
- Tape measure
- Utility knife
- Silicone sealant gun
- Bucket & towels (for minor water spills)
Plumbing Materials:
- Plumber’s tape (PTFE tape)
- Drain assembly kit
- Faucet
- Hot and cold supply hoses
- Flexible drain pipe (if alignment requires adjustment)
- Wall anchors and screws (for mirror installation)
Pro Tip: Shut off the main water supply before starting any plumbing work.
Step 1: Assemble the Sink Drain and Faucet
It’s much easier to install the faucet and drain before placing the sink on the cabinet.
Install the Drain Assembly
- Apply a bead of silicone sealant around the underside of the sink drain opening.
- Insert the drain body into the opening.
- Position the rubber gasket underneath.
- Tighten the brass retaining ring securely.
- Wrap plumber’s tape around threaded connections before attaching the drainpipe.
Make sure everything is aligned straight before fully tightening.
Install the Faucet
- Place the sealing gasket under the faucet base.
- Insert the faucet into the pre-drilled hole.
- From underneath, secure it using the mounting nut.
- Adjust the faucet so it faces straight forward.
- Tighten carefully without over-torquing.
After securing the faucet, attach the hot and cold water supply hoses to the faucet inlets. Hand-tighten first, then use a wrench gently.
Avoid overtightening — it can damage the threads or crack fittings.
Step 2: Assemble and Position the Vanity Cabinet
Freestanding bathroom vanities are often assembled like flat-pack furniture using cam locks or connector bolts.
Follow the manufacturer’s instructions carefully.
Key Things to Check:
- All corners are square
- Panels are fully locked
- Cabinet sits flat on the floor
Once assembled, move the cabinet into its intended position.
Before final placement, check alignment with:
- Hot and cold angle valves
- Wall drain outlet
If plumbing doesn’t align perfectly with the cabinet’s back panel openings:
- Mark required cutout areas.
- Use a jigsaw to create precise openings.
- Sand edges smooth to prevent pipe damage.
Pro Tip: Always measure twice before cutting.
Step 3: Install the Sink and Connect Plumbing
Now comes the most important part — connecting everything without leaks.
Place the Sink
Carefully lower the sink or integrated countertop onto the cabinet.
- Ensure it sits evenly
- Confirm edges align flush
- Apply silicone sealant between the sink and cabinet if required
Let the sealant cure according to instructions.
Connect Water Supply Lines
- Attach supply hoses to the wall angle valves.
- Tighten with a wrench while holding the valve steady.
- Do not overtighten.
Connect the Drain
Perfect alignment is rare in real life.
Use:
- A flexible corrugated drain pipe
- Adjustable P-trap
Ensure all threaded joints are wrapped with plumber’s tape.
Leak Test
Turn the water supply back on slowly.
Check:
- Faucet base
- Drain connection
- Supply hose joints
- P-trap area
Run water for several minutes and inspect carefully.
If you notice drips:
- Tighten slightly
- Reapply tape if necessary
Never ignore even small leaks.
Step 4: Install the Bathroom Mirror
Mirror installation depends on style.
Framed Hanging Mirror (Easier Option)
- Measure hanging brackets on the back.
- Transfer measurements to the wall.
- Drill holes and insert anchors.
- Install screws, leaving slight clearance.
- Hang the mirror and level it.
Frameless Adhesive Mirror (Advanced)
Requires:
- Precise measurements
- Strong mirror adhesive
- Temporary support while curing
If unsure, consider professional help.
Common Mistakes to Avoid
Even experienced DIYers run into issues. Here are common problems:
- Forgetting to shut off water
- Over-tightening plumbing fittings
- Skipping plumber’s tape
- Cutting cabinet openings without double checking
- Not using a level
- Ignoring small leaks
Taking your time is more important than finishing quickly.
When Should You Hire a Professional?
DIY installation is manageable if:
- Plumbing locations already match
- You have basic tool experience
- No pipe relocation is required
However, call a licensed plumber if:
- Drain height needs modification
- Wall pipes must be relocated
- You discover water damage
- Local building codes require permits
Professional installation may cost more upfront but can prevent expensive mistakes.
Final Thoughts
Installing a freestanding bathroom vanity is one of the most beginner-friendly bathroom upgrades you can tackle. Compared to wall-mounted units, the process is simpler because the cabinet rests securely on the floor and does not rely on heavy wall anchoring.
With careful measurements, proper sealing, and patience, most homeowners can complete the project in a single weekend.
If you’re currently planning a bathroom refresh, choosing a high-quality freestanding vanity — whether pre-assembled or ready-to-assemble — can significantly simplify your project while delivering a modern, functional upgrade.
Take your time, double-check every connection, and enjoy the satisfaction of completing your own bathroom transformation.


About author
Related posts

For years, homeowners on Reddit’s r/kitchenremodel and r/DesignMyRoom have asked the same question: “Are two-tone kitchen cabinets a timeless classic, or just a trendy style... Continue reading

When people shop for new cabinet doors, they often focus on color, style, or finish first. That makes sense. But in real home projects, the... Continue reading

Painting bathroom cabinets is not the same as painting a dresser or a living room shelf. A bathroom is a humid space, which means the... Continue reading

Floating cabinets are beautiful. They make a space feel lighter, cleaner, and more refined. No bulky legs, no visual clutter — just a clean, modern... Continue reading

Cabinets take up a large part of any kitchen, bathroom, or laundry room. When the color no longer feels right, the whole space can start... Continue reading


Add comment