No products in the cart.
Return To Shop


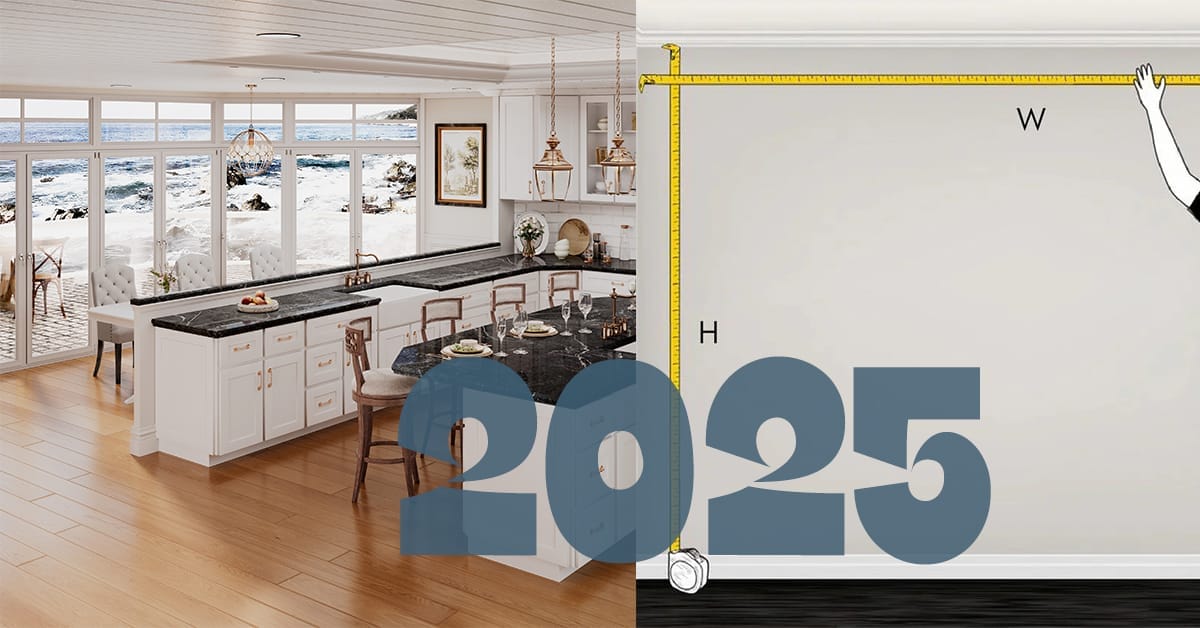
How to Measure Your Kitchen for Cabinets (2025 DIY Measurement Guide)
Imagine you’ve carefully selected your dream kitchen cabinets. You’re excitedly waiting for delivery, only to find the cabinets don’t fit properly—doors won’t close, drawers slam into walls, or worse, you have to return the entire order and start from scratch. This scenario is all too common, and the culprit is almost always inaccurate measurements.
Measuring your kitchen correctly before purchasing cabinets isn’t just a box to check off—it’s the foundation of a smooth, stress-free remodel. Whether you’re a first-time homeowner tackling a renovation, a DIY enthusiast eager to save money, or a seasoned contractor aiming to avoid costly callbacks, mastering precise measurements will:
- Prevent costly mistakes like ordering wrong sizes
- Save time by ensuring your cabinets fit perfectly the first time
- Help you communicate effectively with suppliers and installers
- Allow for better planning of appliances, fixtures, and countertop space
This comprehensive guide walks you through every step of measuring your kitchen with confidence—from understanding wall lengths and ceiling heights to noting obstacles like windows, doors, and appliances. By following these expert tips and practical instructions tailored for the American kitchen layout and cabinetry standards, you’ll be set up for success.
Not sure which cabinet styles or materials to choose after measuring? Explore our ultimate kitchen cabinet buying guide to understand your options and make the right investment for your home.

Table of Contents
1. Get Ready: Tools and Prep for Accurate Measuring

1. Essential Tools for Kitchen Measurement
Having the right tools on hand is the first step to accurate and stress-free kitchen measuring. Here’s what you’ll need:
- Tape Measure (25 ft or longer): A high-quality steel tape measure provides the most reliable and consistent measurements, essential for long wall runs and tight spaces. Avoid cloth tapes—they stretch and cause errors.
- Graph Paper or Printed Grid: Use graph paper with a scale of about one square = 6 inches (or 1/2 foot) to draft your kitchen layout. This helps you visualize space and keep measurements to scale.
- Pencil & Eraser: Simple but vital—pencils allow easy adjustments to your sketches as you go along.
- Level or Laser Level: To check that your walls and ceilings are straight and plumb. Uneven surfaces can affect cabinet installation, so noting this early is important.
- Step Ladder: Many kitchens have high cabinets or vaulted ceilings; a sturdy ladder helps you safely reach these spots for accurate vertical measurements.
- Laser Distance Measurer (Optional): For quicker and very precise measurements of longer distances or tricky areas, consider a laser measurer. Many models are affordable and easy to use.
- Smartphone: Take clear photos for reference, and optionally use measuring apps that can assist with rough estimates or help you organize your notes.
2. Prep Tips to Set Yourself Up for Success
Before you start measuring, a bit of prep work will make the process smoother and more accurate:
- Clear countertops and move furniture: Remove anything blocking walls or cabinets so you can measure edges and corners without obstruction.
- Turn on all lights: Good lighting helps you see corners, trim, and outlets clearly. If natural light is limited, add portable lamps.
- Wipe walls clean: Dust and smudges can obscure edges and trim details. A quick wipe helps you spot exact lines and any molding or baseboards.
- Take wide-angle photos: Photograph each wall from multiple angles. These images serve as valuable visual references when reviewing your sketches or discussing plans with professionals.
3. Visual Tip: Sketch as You Go
Begin by drawing a rough outline of your kitchen on graph paper, marking a clear starting point such as the main entrance or a fixed appliance. Decide on a measurement direction—clockwise or counterclockwise—and stick with it throughout your process. This consistency reduces errors and keeps your notes organized.
Label each wall clearly and note the position of key features like doors, windows, outlets, and vents. Use symbols or shorthand to save time, but make sure your notes are legible for when you revisit them later.
With the right tools and preparation, you’ll lay a strong foundation for your kitchen remodel. Accurate measurements help you avoid costly mistakes and make cabinet selection and installation much easier.
2. Draw Your Kitchen Floor Plan: The Blueprint for Success
Once you’ve gathered your measurements and tools, it’s time to create a clear, to-scale floor plan of your kitchen. This visual blueprint will be your most valuable reference for cabinet shopping, design decisions, and communicating with contractors or installers.
How to Draw Your Kitchen Floor Plan

Learn how to accurately draw your kitchen floor plan before remodeling or ordering cabinets. This step-by-step guide helps you mark key elements like walls, windows, and utilities to avoid costly mistakes.
Total Time: 1 hour
Choose the Right Paper and Scale

Use graph paper with a clear scale, such as 1 square = 6 inches (or 1/2 foot), to keep proportions accurate. Neatness isn’t as important as accuracy.
Label Each Wall
Mark each wall in a clockwise direction using letters (A, B, C, etc.). This helps with organization and future referencing.
Add Doors and Windows
Sketch all doors and windows with approximate widths. Don’t forget to mark which way each door opens (inward, outward, left, right).
Indicate Utilities
Mark the location of gas lines, plumbing, and electrical outlets. This helps prevent installation issues during cabinet and appliance placement.
Outline Major Appliances
Draw in appliances like the refrigerator, stove, dishwasher, and microwave. Try to include their dimensions.
Mark Architectural Features
Identify any obstacles like vents, radiators, or columns that might interfere with your cabinet layout.

Pro Tip: Use Color Coding for Clarity
Using different colored pencils or pens to distinguish walls, electrical points, plumbing fixtures, and appliances can make your sketch much easier to interpret at a glance. For example:
- Red for electrical outlets and switches
- Blue for plumbing lines and fixtures
- Green for doors and windows
- Black or gray for walls and structural features
Why This Matters for Your Remodel
A well-drawn floor plan:
- Helps avoid costly mistakes by clearly visualizing space constraints and appliance locations
- Enables better communication with cabinet suppliers and installers—everyone will be on the same page
- Makes it easier to plan for workflow and functionality, ensuring your kitchen is both beautiful and practical
- Allows you to spot potential issues early, such as door clearance conflicts or tight spaces
Once your floor plan is complete, keep it handy—whether digitally scanned or as a physical copy—because you’ll refer back to it frequently during cabinet selection, ordering, and installation.
If you’re shopping online, knowing how to evaluate cabinet options is just as important as measuring your space. Learn how to compare the best kitchen cabinets online and make a confident purchase.

3. Measure Walls and Ceilings: Precision is Key
Accurate measurements of your walls and ceilings are fundamental to ensuring your new cabinets fit perfectly and avoid costly adjustments during installation.
1. How to Measure Wall Lengths
- Using your tape measure, measure each wall from corner to corner, following the measurement direction you established earlier (clockwise or counterclockwise).
- Record these measurements clearly on your floor plan sketch next to the corresponding wall label (A, B, C, etc.).
- For walls longer than your tape measure, use a helper to hold one end or use a laser distance measurer for improved precision.
2. Measuring Wall Heights
- Wall height can vary—especially in older homes where ceilings may slope or walls may bow. Measure wall height at multiple points (at least three per wall: left end, center, and right end).
- Record each height measurement on your sketch next to the corresponding wall segment. This helps you plan for any uneven surfaces and avoid cabinet misalignment.
- Use a level or laser level to check if your walls are perfectly vertical (plumb) or bowed inward/outward. Bowed walls might require shimming or custom adjustments during installation.
3. Don’t Forget Bulkheads and Soffits
- Measure any bulkheads, soffits, ceiling beams, or dropped sections that protrude into the wall space. These architectural features can affect cabinet height and placement.
- Note their exact location and size on your plan. For example, a soffit running along one wall might reduce the available height for upper cabinets.
Visualize This:
Imagine standing in the corner of your kitchen with a tape measure, measuring the height of the wall in three spots—left, center, and right—and marking these values on your sketch. This gives a realistic picture of any slope or unevenness, ensuring your cabinets fit snugly without gaps or awkward cuts.
Why This Matters
- Ensures cabinet boxes and crown molding fit seamlessly against walls and ceilings
- Helps you and your installer anticipate and resolve fitment challenges early
- Avoids surprises during installation that cause delays and added costs
4. Doors, Windows & Obstacles: Don’t Overlook the Details
When planning your kitchen remodel, paying close attention to doors, windows, and other architectural features is crucial. These details can significantly impact cabinet placement and design, so precise measurements here save you headaches down the line.
1. Measuring Doors and Windows
- Measure door and window widths and heights from frame to frame—not just the opening. This includes any trim or molding which can add several inches.
- Measure the distance from the edge of doors and windows to the nearest corners or adjacent walls. This helps determine how much cabinet space is available nearby and if fillers or custom pieces are needed.
- For windows, measure the window sill height from the floor—this is key for fitting base cabinets or appliances beneath.
- Record the door swing direction carefully: Note whether doors open inward or outward and whether they hinge on the left or right side. This prevents cabinets from blocking door operation or creating tight clearance issues.
2. Don’t Forget Architectural Obstacles
- Identify and measure any building features like:
- Baseboard heaters or radiator covers (common in older or traditional American homes) that protrude from walls
- Exposed ceiling beams or bulkheads that lower ceiling height in spots
- Columns, vents, or wall niches that interrupt wall surfaces
- Note the thickness of window and door casings (trim and molding), which can vary widely and affect cabinet fit and installation.
3. Practical Hint: Use Your Floor Plan to Mark Door Swings and Trim
- Draw arrows on your floor plan indicating door swings to clearly visualize clearance areas.
- Write down trim widths or casing thickness next to each opening so you remember to account for these when selecting cabinet sizes and fillers.
4. Why This Level of Detail Matters
- Avoids ordering cabinets that interfere with door or window operation
- Helps you choose the right fillers or customized pieces to create a clean, professional look
- Ensures base cabinets don’t block heating units or vents, maintaining comfort and safety
- Provides your installer with a complete picture to plan cabinet placement precisely
Taking time now to measure and record these details with care can save you costly modifications during or after cabinet installation.
5. Appliances and Utilities: Record Critical Dimensions
Accurately documenting your appliances’ dimensions and utility locations is essential to ensure your cabinets fit perfectly around them, and that your kitchen functions smoothly.
Create a Clear Appliance Dimension Table
Use a simple table to organize the width, depth, height, and any installation notes for each major appliance. Here’s a sample format you can use:
| Appliance | Width (inches) | Depth (inches) | Height (inches) | Notes |
|---|---|---|---|---|
| Refrigerator | Leave 1–2″ clearance for airflow and door swing | |||
| Range/Oven | Confirm exact size for countertop alignment | |||
| Dishwasher | Leave ~2″ clearance for plumbing and ventilation | |||
| Microwave | Account for built-in or countertop placement | |||
| Hood Vent | Mount 24–30″ above cooktop for safety and efficiency |
Note Utility Locations Carefully
Mapping utility points is crucial for smooth appliance installation and compliance with building codes:
- Water supply and drain lines: Measure and note the exact location for your sink and dishwasher hookups.
- Gas lines: If you have a gas stove or oven, mark the gas inlet position precisely.
- Electrical outlets: Record the location and height of all power outlets that will serve your appliances, including those for microwaves and hood vents.
- Hood vent placement and height: Typically, range hoods should be installed 24 to 30 inches above the cooktop for optimal performance. Measure ceiling height and mark this clearly on your plan.
Why This Matters
- Ensures adequate space for appliance installation and operation, preventing last-minute cutting or repositioning.
- Helps you and your installer coordinate cabinetry and utility placement, avoiding clashes with plumbing or electrical lines.
- Supports compliance with safety codes and manufacturer installation requirements.
Pro Tip: Keep Appliance Manuals Handy
If possible, locate and reference your appliance manuals or manufacturer specs during measurement. They often specify minimum clearances and special installation requirements that can impact cabinet design.
With this detailed information logged alongside your kitchen floor plan, you’ll avoid costly surprises and make the entire remodel process smoother and more efficient.

6. Cabinet Placement: Understand the Key Measurements
Standard Cabinet Dimensions You Need to Know
Understanding typical cabinet sizes is essential for planning your kitchen layout and ensuring everything fits and functions properly:
- Base Cabinets: Usually 24 inches deep and 34.5 inches tall without the countertop. When you add a standard 1.5-inch countertop, total height reaches approximately 36 inches, which is the typical countertop height for comfortable work surfaces.
- Wall Cabinets: Generally 12 inches deep, with heights ranging from 30 to 42 inches depending on ceiling height and storage needs. Taller cabinets provide more storage but may require step stools for access.
- Countertop to Wall Cabinet Clearance: A standard gap of 18 inches is recommended between the countertop surface and the bottom of the wall cabinets, allowing ample workspace and clearance for backsplash installation.
Kitchen Layout Recommendations for Comfortable and Functional Spaces
- Walkway Clearance: Maintain at least 36 inches of clear space between runs of cabinets or between cabinets and kitchen islands. This clearance allows for comfortable movement and safe operation of cabinet doors and appliances. For heavy-traffic kitchens, consider increasing this to 42 inches.
- Corner Fillers: Use corner filler pieces to prevent cabinet doors and drawers from bumping into each other at corners. These fillers also improve the aesthetic finish and allow proper door swing.
- Sink Placement: Whenever possible, center your sink beneath a window. This placement maximizes natural light over the sink area and creates a pleasing visual balance. It also helps in ventilation and makes the space feel more open.
Visual Hack: Tape It Out Before You Commit
Before placing your cabinet order, use painter’s tape to outline cabinet footprints and walkways directly on your kitchen walls and floors. This simple technique lets you:
- Visualize how much space cabinets will occupy
- Walk through your kitchen to test clearance and flow
- Identify any potential tight spots or awkward corners
- Make adjustments early without costly changes later
Why These Measurements Matter
- Ensures your kitchen layout is comfortable, safe, and efficient
- Prevents costly installation errors caused by insufficient space
- Helps you communicate clearly with cabinet suppliers, designers, and installers
- Creates a kitchen that looks balanced and feels intuitive to use
If you want, I can help you create a printable layout planner sheet with these standard measurements and tips included—perfect for your remodel toolkit. Interested?
Looking for budget-friendly cabinets that still offer style and durability? Check out our expert-reviewed list of the best kitchen cabinets under $500 to find affordable options that fit your layout perfectly.
7. Common Measurement Mistakes and How to Avoid Them
Accurate measurements are the backbone of any successful kitchen remodel. However, even small mistakes can lead to costly delays, ill-fitting cabinets, or extra work during installation. Here are some of the most frequent measurement errors homeowners and DIYers make—and how you can easily avoid them.
| Common Mistake | Consequence | How to Fix It |
|---|---|---|
| Measuring only once | Undetected errors cause fit issues | Always measure at least twice—better three times—to confirm accuracy. Double-check critical dimensions and have someone else verify your numbers if possible. |
| Ignoring trim, molding, and outlets | Cabinets won’t fit flush or block outlets | Include baseboards, door/window trim, and outlet covers in your sketches and measurements. Measure thicknesses and clearances carefully to account for these additions. |
| Skipping ceiling height checks | Upper cabinets may be too tall or short | Measure ceiling heights at multiple points along each wall. This is especially important in older homes where ceilings may slope or be uneven. |
| Assuming walls are perfectly square | Visible gaps, misaligned cabinets, uneven seams | Measure diagonals of your kitchen layout to check for squareness. Use a carpenter’s square or angle finder to confirm corners and adjust your plans accordingly. |
Additional Tips to Avoid Measurement Errors:
- Use consistent units: Stick to inches or feet and fractions throughout your measurements to avoid conversion mistakes.
- Write everything down clearly: Legible notes on your sketch prevent confusion when ordering or installing cabinets.
- Check appliance specs: Confirm dimensions from manufacturer manuals rather than relying solely on your own measurements.
- Keep your measuring tools calibrated: A bent tape measure or inaccurate laser tool can cause subtle errors. Test tools periodically against a known standard.
Why Paying Attention to These Details Saves You Money
Minor measurement errors can cascade into major problems—requiring cabinet returns, costly custom modifications, or even redesigning your kitchen layout. Taking time to measure carefully upfront helps your remodel stay on budget and on schedule.
8. Pro Tips from Designers
When it comes to kitchen measuring, following a few expert tips can make all the difference between a smooth remodel and costly headaches. These insights come straight from professional kitchen designers and installers who see common pitfalls every day.
1. Use a Laser Level to Check Walls and Ceilings
A laser level is invaluable for verifying that your walls are perfectly straight and plumb. Uneven or bowed walls are common, especially in older homes, and can affect cabinet fit and alignment. Spotting these issues early lets you plan for shimming or adjustments during installation.
2. Measure Room Diagonals to Confirm Squareness
Measuring the diagonals of your kitchen space is a quick way to check if your room is truly square. If the diagonal measurements differ by more than 1/4 inch, your walls are likely out of square, and you’ll need to factor this into your cabinet layout to avoid gaps or misalignment.
3. Write All Measurements Clearly Using Consistent Units
Always document your measurements clearly on your layout sheet, using inches or feet with fractions consistently. Avoid mixing units, which can lead to confusion or mistakes when ordering cabinets or communicating with installers.
4. Save or Scan Your Sketch as a PDF and Take Photos
Once your floor plan and measurements are complete, digitize your documents by scanning or photographing them with good lighting. Creating a PDF or digital file makes it easy to share with cabinet makers, designers, or contractors—ensuring everyone works from the same accurate information.
Bonus: Additional Designer Hacks
- Label each measurement with its location (e.g., Wall A height, Window B width) for quick reference.
- Keep your measuring tape taut and level to avoid sagging or inaccurate reads.
- Use painter’s tape on walls and floors to mark cabinet footprints and test walkways before finalizing orders.
- Double-check critical appliance openings (like fridge or oven spaces) against manufacturer specs.
Why Following These Pro Tips Pays Off
Accurate, well-documented measurements make your kitchen remodel:
- Faster and easier for installers
- Less prone to costly errors or last-minute changes
- More likely to meet your design and functional expectations perfectly
9. Bonus: Handy Templates and Tools to Simplify Measuring
To make your kitchen measuring process smoother and more accurate, leverage these practical templates and digital tools favored by homeowners and professionals alike.
Printable Kitchen Grid Templates
Download free graph paper templates with 6-inch squares, perfectly scaled for kitchen floor plan sketches. These grids help you draw your layout to scale without guesswork, making it easier to visualize cabinet placement and room flow.
Pro Tip: Print several copies so you can revise or make notes during your measuring process.
Measurement Apps with Augmented Reality (AR)
If you prefer using your smartphone or tablet, several apps offer AR-assisted measuring, making complex measurements faster and more precise:
- MagicPlan: Creates floor plans by capturing room dimensions through your device’s camera. Also allows adding annotations for utilities and obstacles.
- RoomScan Pro: Automatically scans rooms and generates detailed, scaled floor plans with little manual input.
- Google Measure: A simple AR ruler app for quick length and height measurements on compatible Android devices.
These apps can supplement your tape measure and graph paper, especially for hard-to-reach areas or complex layouts.
Online Cabinet Layout Calculators
Interactive calculators and layout tools can help you estimate cabinet spacing and dimensions before ordering:
- Search for “kitchen cabinet layout spacing estimator” or “kitchen planner” to find user-friendly web-based tools.
- These calculators often include preset standard dimensions and customizable options to experiment with different layouts and walkways.
Why Use These Tools?
- Save time and reduce manual errors by automating measurements or providing clear visual guides.
- Easily share digital floor plans with cabinet makers, designers, or contractors.
- Experiment with different layouts and configurations virtually before committing to purchases.
Ready to Get Started?
- Try MagicPlan or RoomScan Pro—both offer free versions to test.
- Use an online cabinet layout calculator to preview your remodel in minutes.
10. Final Pre-Order Checklist: Double-Check Everything
Before you place your cabinet order, take time to thoroughly review your measurements and documentation. This final check helps you catch any oversights and avoid costly mistakes.
Your Essential Pre-Order Checklist:
- Confirm all wall lengths — measure twice (or thrice!)
Double- or triple-check every wall length to ensure accuracy. Even a small discrepancy can lead to ill-fitting cabinets or unexpected gaps. - Check ceiling heights on every wall
Measure ceiling height at multiple points along each wall to accommodate any slopes or uneven surfaces that could affect upper cabinet installation. - Record all appliance sizes and utility locations
Make sure your table of appliance dimensions is complete and includes any required clearances. Verify plumbing, gas, and electrical hookup locations relative to cabinet placement. - Mark doors, windows, and trim accurately
Ensure your floor plan clearly shows door and window dimensions, swing directions, and trim thickness. These details impact cabinet sizing and fillers. - Note electrical outlets, switches, and plumbing connections
Identify and document exact locations for outlets, light switches, water lines, and vents that may affect cabinet positioning or require cutouts. - Complete a clear, labeled sketch with all notes
Your kitchen layout drawing should include all measurements, labels for walls and features, notes on utilities, and any special instructions for your installer.
Bonus Tips:
- Keep all your measurement sheets, photos, and digital files organized in one folder for easy access.
- Share your finalized measurements and plans with your cabinet supplier or installer to confirm their completeness.
- Ask for a professional review if you’re unsure—many cabinet companies offer pre-order consultations or measurement verification services.
Why This Checklist Matters
Taking these steps ensures your kitchen remodel runs smoothly, your cabinets fit perfectly, and you avoid expensive last-minute adjustments or returns.
Frequently Asked Questions About Measuring Your Kitchen
Can I measure my kitchen by myself, or should I hire a professional?
You can absolutely measure your kitchen yourself—many homeowners do. However, having a second person to help hold the tape measure, double-check numbers, and assist with reaching tricky corners can improve accuracy and save time.
That said, if your layout is complex or you’re unsure about interpreting blueprints or wall irregularities, hiring a professional measurer or asking your cabinet provider for a measurement service is a smart move. Some companies even offer free measurement appointments with a cabinet purchase.
What if my walls or floors aren’t perfectly square or level?
Uneven walls, sloped ceilings, or slightly unlevel floors are common in both old and new homes. Don’t panic—cabinet installers expect it.
To compensate, professionals use filler strips, shims, and scribe moldings to bridge gaps and create a flush, clean look. During the measuring process, it’s important to note where the wall bows or the ceiling slopes, especially if you’re installing tall or full-height cabinetry. Be sure to record the narrowest and widest points so your installer can plan accordingly.
Should I include crown molding or baseboard trim in my measurements?
A: Yes—always account for crown molding, baseboards, and window/door casings in your measurements.
For example:
If you plan to install crown molding above your wall cabinets, measure from the ceiling down, and subtract the height of the molding to get your cabinet height.
If baseboard or shoe molding affects base cabinet fit, measure to the trim edge or consider removing the trim temporarily when installing new cabinets.
Providing accurate trim dimensions will help your cabinet supplier recommend the best fit and finish.
Which measurement matters more—width, height, or depth?
A: All three are equally critical.
Width ensures your cabinets fit between appliances, walls, and doorways.
Height determines if your cabinets hit the ceiling, interfere with crown molding, or match appliance dimensions.
Depth matters especially for corner cabinets, island layouts, and ensuring drawers/doors don’t hit each other or nearby objects.
Even a ½-inch error in any of these directions can result in doors not opening fully, unsightly gaps, or worse—cabinets not fitting at all.
What’s the best way to double-check my measurements?
After you’ve measured once, go back and measure again—preferably on a different day with a fresh set of eyes. Compare your results.
You can also create a to-scale floor plan on graph paper, use a kitchen design software tool, or email your drawings to a cabinet specialist for review. Some companies will create a 3D layout or catch inconsistencies for you—often for free or a small deposit.
Conclusion: Start with a Tape Measure, Finish with Confidence
A dream kitchen doesn’t begin with a cabinet catalog—it starts with a tape measure and a well-thought-out plan. Accurate measurements are the cornerstone of a smooth remodeling process. Whether you’re working with a contractor or ordering pre-assembled or RTA cabinets online, precise dimensions help ensure a perfect fit, avoid costly mistakes, and speed up installation.
By taking the time to follow this step-by-step measuring guide, you’re doing more than just jotting down numbers—you’re laying the groundwork for a functional, beautiful space that reflects your lifestyle. From wall lengths and ceiling heights to appliance clearances and outlet positions, every detail matters. Still have more questions? Visit our complete RTA Cabinets FAQ guide for 45+ quick answers from U.S. cabinetry pros.
Pro Tip: Don’t just measure once—measure twice, and sketch everything out. A clear, labeled diagram with all relevant notes is invaluable when communicating with your cabinet supplier or installer.


Related posts

In 2026 the most practical and reliable bathroom color strategy is to use light neutral tones that feel timeless comfortable and easy to live with... Continue reading

A 30‑Year Veteran Designer’s Honest Guide for Homeowners When you’re planning a kitchen remodel, it’s common to overlook just how big a chunk of the... Continue reading

Your guide to understanding warranty coverage for Ready-To-Assemble kitchen cabinetry When you’re remodeling a kitchen in the U.S., more and more homeowners are choosing RTA... Continue reading

When it comes to the quality of a cabinet, the material is key. On the U.S. market today, cabinets are generally made from five types... Continue reading

Did you know that kitchen cabinets can account for 30% to 40% of a total kitchen remodel cost? That means if you’re working with a... Continue reading


Add comment