No products in the cart.
Return To Shop


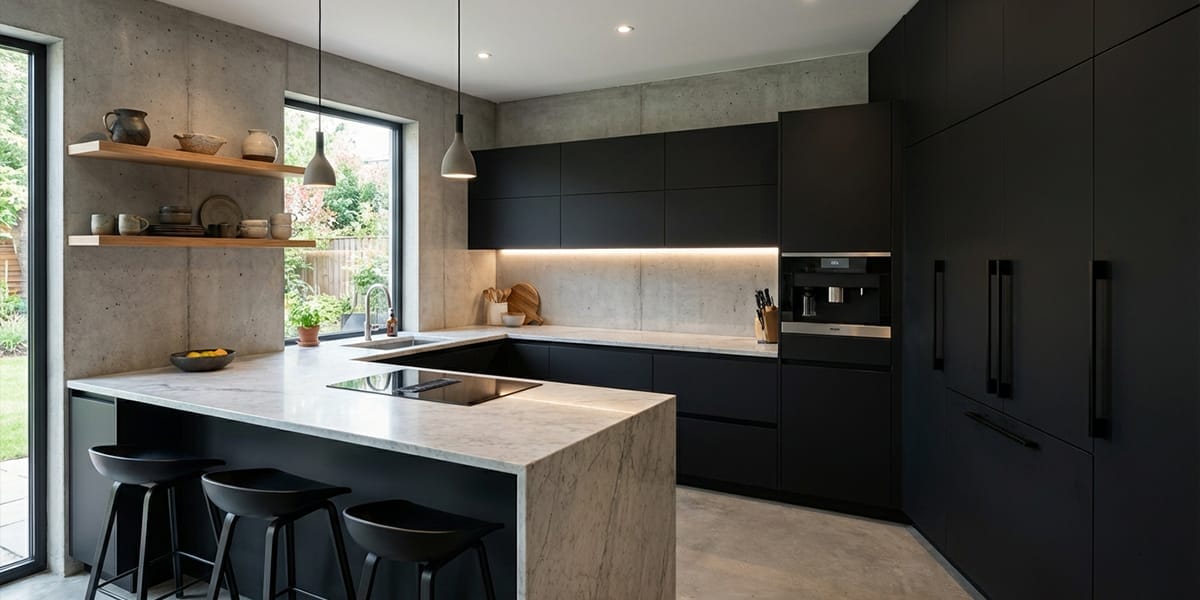
DIY Kitchen Cabinets: A Smart Way to Save Money (If You Do It Right)
Let me say this first—
Building your own kitchen cabinets can save you a lot of money.
But it’s not for everyone.
I’ve seen homeowners save thousands…
And I’ve also seen people get halfway through and wish they never started.
So let’s talk about this honestly—like I would with my own family.
Table of Contents
First Question: Should You DIY Your Cabinets?
Before anything else, ask yourself:
- Do you have basic tools (or are willing to rent them)?
- Are you comfortable measuring and cutting accurately?
- Do you have the time and patience?
If the answer is yes, then DIY cabinets can save you 30–50% compared to custom cabinets in the U.S.
That’s real money.
If not?
It might be better to consider RTA (ready-to-assemble) cabinets instead.

Where DIY Cabinets Really Save You Money
Most of the cost of kitchen cabinets comes from:
- Labor
- Custom sizing
- Installation
When you do it yourself, you remove a big part of that cost.
Typical custom cabinets: $1,800 – $5,500+
DIY cabinets: often $600 – $2,200
But saving money only works if you plan it right.
Step 1: Keep the Design Simple
This is where many people go wrong.
You don’t need:
- Complicated layouts
- Fancy cabinet shapes
- Custom angles
Simple layouts (straight, L-shape, U-shape) are easier, faster, and cheaper.
Also think about real life:
- Leave space for your coffee maker
- Make sure drawers are easy to reach
- Don’t overfill the kitchen with cabinets
Good design is about how you use the space, not how complex it looks.
Step 2: Choose Materials Wisely (Don’t Overspend Here)
You don’t have to use expensive solid wood everywhere.
In the U.S., most DIY builders use:
- Plywood or MDF (great balance of cost and durability)
- Moisture-resistant panels for longer life
Save money on structure, not on performance.
Also make sure materials are:
- Safe (low emissions, CARB compliant)
- Suitable for humid kitchen environments
Step 3: Tools—Buy Smart or Rent
You’ll need basic tools:
- Saw
- Drill
- Measuring tools
- Level
If you’re only using them once, rent them.
No need to overspend just to complete one project.
Step 4: Build Strong, Not Fancy
Focus on structure first.
- Measure carefully (this matters more than anything)
- Use both screws + wood glue
- Keep everything level
A simple cabinet that’s strong will always beat a fancy one that falls apart.
Take your time here. Rushing is where mistakes happen.
Step 5: Finish for Durability (Not Just Looks)
Once built, protect your cabinets.
- Sand properly
- Use 2–3 coats of paint or finish
- Choose moisture-resistant coatings
Kitchens deal with water, oil, and heat every day—your finish matters.
Step 6: Install It Right (Safety First)
This part is critical.
- Always mount wall cabinets into studs
- Double-check alignment
- Test every door and drawer
A poorly installed cabinet isn’t just annoying—it can be dangerous.
When DIY Is NOT the Best Choice
I always tell homeowners this:
DIY is great only if you can finish the job properly.
You may want to skip DIY if:
- You’re short on time
- You’re not comfortable with tools
- You want a perfect, high-end finish
In those cases, RTA cabinets are often a smarter middle option—still affordable, but much easier.
Final Thoughts
DIY kitchen cabinets aren’t just about saving money.
They’re about:
- Taking control of your budget
- Building something that fits your life
- Avoiding unnecessary costs
But the goal isn’t just to spend less.
It’s to build something you won’t regret every time you walk into your kitchen.
If you do it right, DIY cabinets can be one of the smartest decisions in your renovation.
If you rush it?
It can quickly become one of the most frustrating.


About author
Related posts

For years, homeowners on Reddit’s r/kitchenremodel and r/DesignMyRoom have asked the same question: “Are two-tone kitchen cabinets a timeless classic, or just a trendy style... Continue reading
When people shop for new cabinet doors, they often focus on color, style, or finish first. That makes sense. But in real home projects, the... Continue reading

Painting bathroom cabinets is not the same as painting a dresser or a living room shelf. A bathroom is a humid space, which means the... Continue reading
Floating cabinets are beautiful. They make a space feel lighter, cleaner, and more refined. No bulky legs, no visual clutter — just a clean, modern... Continue reading
Cabinets take up a large part of any kitchen, bathroom, or laundry room. When the color no longer feels right, the whole space can start... Continue reading


Add comment